Posts filed under materials

Ground Shots Podcast Interview on Bark Tanning With Kelly Moody

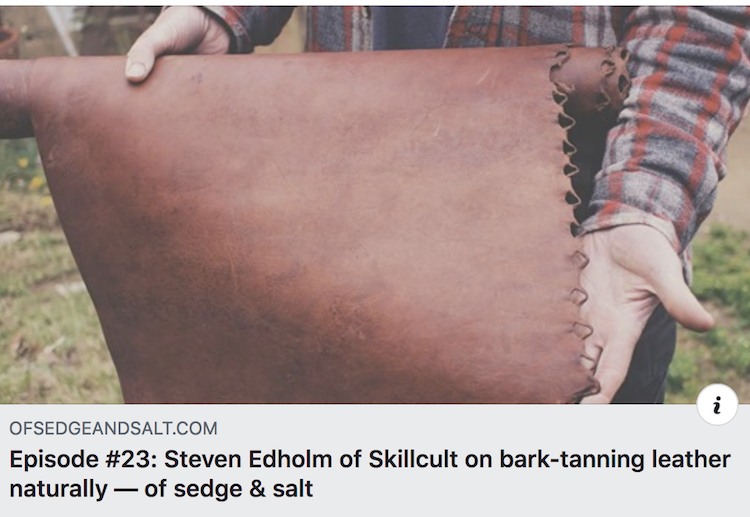
I sat down with Kelly Moody and traveling podcaster to discuss bark tanning. Kelly is a tanner herself and we get into specifics about tanning with tannic acid and some related stuff. It was fun and maybe we’ll do the same with some other topics when she comes back through sometime. This was my first podcast guest spot.

https://www.ofsedgeandsalt.com/ground-shots-podcast

Deer Leg Skins, Sinews, Hooves, Hide Fleshing and Processing Videos

I shot some footage to possibly use as support videos for my book, Buckskin, The Ancient Art of Braintannning which is in process for reprinting.  These are some videos I put together from that footage recently.  More for the archives.

What to Do With Those Axe Cut Woodchips? The Burning Question

One of the most common questions, if not the most common question on my axe related content is some combination of what do you do with the chips, aren't they wasteful compared to a saw and wouldn't it be better to just use a saw.  The video below is about that and what we can do with the chips which are quite useful for anyone with a garden or who burns wood.  Below that are some further thoughts not really covered in this video.

What I covered in that video was, in short, yes there are a lot of wood chips produced when processing wood with an axe.  This tree was probably 9 inches in diameter and I estimated about two good firewood logs worth of chips were produced.  It takes under 5 minutes to pick up 80% or more, in this case 3.5 minutes.  I talked about what you can use them for, like biochar, mushroom growing and fuel, and how whether it is viewed as wasteful or not is a matter of context.  What I didn't really talk about is why some of us use axes and not saws for hand processing firewood. 

I didn't talk about that, because I more or less just forgot to!  I think that in my head it would be self evident that not I, nor anyone else, is using an axe because it is the quickest and most efficient method of firewood production.  I like saws.  I like my chainsaw.  I'll be using my chainsaw a lot for processing wood this year, not because I need the wood, but because I need to deal with a lot of sick trees that will soon be a fire hazard and which represent a short term opportunity to gather some resources that will soon be unavailable.

But, when I set out to do the cordwood challenge myself the previous season, challenging myself to cut a cord of wood in 3 months, I was slightly wary.  Before committing I think I went and cut up a small tree or two just to be sure I should be announcing to the entire internet that I was going to go for it.  Aside from potential personal limitations though, I knew I could do it, because people used to do it.  Dudley cook said in The Axe Book, that a good axeman could put up 2 cords a day!  I knew the cord he was talking about had to be in at least 24 inch lengths, and not the 16 inch stove lengths I was cutting.  More probably it was cut into between 32 and 48 inch lengths for industrial use, transportation in bulk and most probably very wide fireplaces.  Charcoal makers would cut wood even longer to make large stacks of wood.  Still, do the math.  I'm cutting about 3 times as much to get my 16 inch logs as a guy cutting 32 inchers, but even the slowish guy could probably put that up in just 3 days of average work!

Well, that is interesting to think about, but it doesn't prove anything to me for real or gain me a lot of real insight.  To gain knowledge it is required of us to take information and do more than absorb it, more than mull over it and make assumptions and inferences.  For me that process looks more like taking in information, contemplating it, putting it into practice, maybe getting more information, more experience, more contemplation etc.  At some point, something resembling truths begin to gel out of that process.  In short, I knew that to gain real insight into the problem of axe work and what it's potentials and limitations really were, I had to put it into practice for reals.  Not only that, but I actually had to improve my own skills to a certain level before I could really understand what that potential was and where an axe may be more or less useful than a saw.  Give an unskilled person an axe and a hand saw and tell them to limb this same tree and they are likely to conclude that the saw is easier and faster.  But no matter how good they get with that saw, I'll have the same tree limbed up more quickly, with much less physical effort and many of by knots will be trimmed more closely than theirs.

I'll also have way more fun doing it!  Axe work is engaging, exciting, focusing, cultivates coordination and provides a diverse form of exercise.  Sawing by comparison is dull and tedious work and the best you can do is trade off one side for the other.  I like sawing up to a point.  It is good honest contemplative work.  It is also skilled work and a good hand with a saw will out saw a newb every time.  But it is only so skilled and lacks the special combination of things that makes axe work really engaging and fun.  Saws have their place as do axes.  But the place an axe has in any one particular persons hands is informed by that persons skill level and understanding of it's efficient use, and that requisite skill is only gained by extended use, and not by dabbling at the thing.

All of which is to point out that, while my use of an axe on that fir tree in these last couple of videos did result in two fewer logs worth of large firewood, rather than smaller chips, such is simply part of the cost of admission into that understanding of what is and is not possible with an axe and what place it does or doesn't have in our tree work.  It's a rather small price it is to pay when they are easy to pick up and decidedly very useful as fuel or for other purposes.

And repeat thousands of times :)

And repeat thousands of times :)

Pet Lime Kiln Update, 10 Burns, 30 Gallons and Where to Go From Here

Here is my 100th video on youtube, an update on the last lime kiln I built.  It looks as though the main thing to address in this design is erosion of the edge.  I am thinking that a rim of cob-like material (probably just clay and sand) might do the trick.  That begs the question of why not just build the entire thing out of cob or similar material in the first place?  Well, that is certainly a possibility.  I don't think it would have the same insulative value, but that may not matter in the end.  It is impossible to know without testing the idea.  There are some advantages to the pet kiln under various circumstances though.  It is fast to build and can be built up all at once.  A similar cob structure would need either support or drying time between layers.  Less clay is required, which could be important sometimes.  My intuition is that the insulation value of thousands of tiny holes and grass stems is significant, but again, I can't know without testing that proposition.  Of course a similar list could probably be generated for the benefits of cob.  not need to make it one or the other.  The more tools we have in our box, the more we can adapt to varying needs and circumstances.

I may pursue some ideas I have with the pet kiln concept, but I have quite a few other lime burning projects I'd like to try as well, including scaling up to a bigger more sophisiticated set up.  I may even test the feasibility of burning lime for sale, but honestly, my interest is more in testing the proposition to assess the feasibility of lime burning as a cottage industry for other people to pursue, or the feasibility of producing moderately large quantities on site for projects, rather than for the actual money I'd make.  Curiosity is a curse and a blessing.

Also posted below, a recent video of my just walking around the homestead talking about stuff.  I could do that for days.

Posted on June 11, 2016 and filed under fire, Lime, materials.

What Type of Lime Should You Use for Tanning and Rawhide?

I remember many years ago trying to understand what type of lime I should use for tanning and being really confused.  This video and blog post are an attempt to foster a basic understanding of lime as well as which type to use and where to find it.

Lime is used in tanning to loosen the hair for removal, and sort of clean the skin fiber of unwanted substances.  It is used in the same way for processing rawhide as well as skin for making glue.  While there are other alternatives, lime was most commonly used in 18th and 19th century tanning processes and by home tanners since.  It is easy to use, accessible, safe, predictable and does he job well.

What we call lime exists in a cycle.  There are three stages in the cycle and once the cycle is completed, it could theoretically be started over again.  Only one of the stages is useful for tanning and in the majority of other arts.

The first phase is the one in which lime naturally occurs.  That is as calcium carbonate.  Calcium Carbonate is what shells and limestone are made from, the natural materials from which we make the lime that we use.  This form would include chalk, limestone, dolomite, marl, marble, shells and coral.  Calcium carbonate is fairly inert and stable.  Ground limestone or ground shells can be used as a soil amendment to raise ph and provide calcium, but not for tanning.

Shell, limestone and marble, three common forms of calcium carbonate.  Any of the stones may have any number of impurities, Magnesium being very common.  Shells are probably ideal for tanning use since they are very pure being almost all calcium carbonate.  They are also very easy to turn into lime.

If we heat calcium carbonate up red hot we end up with Calcium Oxide aka quicklime.  Qucklime is mostly an interim stage, though it has some uses in the arts and industries.  As relates to tanning, it is an interim stage.  If you read old tanning books that say to use quicklime, but that is because they acquired quicklime and slaked it immediately into the the next form for use.  Quicklime is easy to transport because it is very light, and it just made sense in the old days to order freshly burned quicklime and transport it that way. It would then be slaked immediately as it does not keep well.

Quicklime, also known as lime shells whether made of shells or rocks.  As far as tanning goes, quicklime is just an interim stage.  Voraciously thirsty, unstable and highly reactive, lime shells should be processed immediately.  When quicklime is mentioned in old tanning literature it is often stated something like "take fresh burned lime".  Easy to transport because of their light weight, lime shells were often delivered fresh and slaked immediately in the liming pits.

When we add water to quicklime, it produces Calcium hydroxide in one of two forms.  If we add a lot of water to the quicklime we end up with lime putty.  If we add only a little water, the quicklime disintegrates into a fine powder that can be stored dry.  

The dry powder, Dry lime hydrate is what you can easily buy for processing hides for tanning.  It is available at hardware stores as "type S lime" or "builders lime" and according to some of my viewer/readers as "barn lime" in some parts of the country sold for spreading on barn floors.  Just make sure that you are not getting dolomite or agricultural lime which is just ground up rocks.

Dry lime hydrate, the stuff you can get at the local building supply, is made using small amounts of water, which causes the burned quicklime to disintegrate into a fine powder.  This process doesn't always work on shells.  At least use hot water with shells, then it might work.  Really though, you should make lime putty at home.  It is more stable and more potent than the dry hydrated lime.

Lime putty can be made at home. It is more potent than dry hydrate and less apt to go bad since all you have to do to preserve it is keep it under a layer of water where it will keep indefinitely.  Either dry hydrate or lime putty can be used in tanning to equally good effect though, you just don't have to use quite as much lime putty.  For more on lime in general and burning lime at home, see the lime page.

To make lime putty, just use more water.  The solids will settle to the bottom of the storage container.

For more on what lime is actually used for, tanning and pre-processing hides, you can see this video on de-hairing.

Related Videos  

Straightening an Axe Handle by Steaming and Limbering the Fibers

This video is about straightening the green baywood axe handle that I made a couple of months ago, which warped during seasoning.  The first steaming failed, so I pulled out all the stops this time around soaking, steaming and stretching out the wood fibers to even out tensions in the wood.  I've been using the axe quite a bit and it has stayed put even though it is flexed a lot during use.  Long term results may not be as good, but for now, so far, so good, so I'll call that a tentative success!

Posted on April 27, 2016 and filed under axes, materials, tools.

Burning Shell Lime in a Primitive Straw/Clay Kiln

Tomorrow/Today is my birthday.  As I sit here at 11:58 pm, sipping tequila out of a bottle, trying to trap a loud and pesky mouse that is rolling bay nuts around the trailer and finishing up posting this project so I can move on to the next one, I want nothing more than to top the 1000 mark on my YouTube subscriptions today.  I have 959 subscribers, so only 41 to go!  If you can share this video somewhere that you think people will truly enjoy it and help me top 1000 subs by the end of the day, I will be just really happy about that.  Small victories you know.

I have two bottles of champagne.  One for reaching 1000 subs and another one for my first really mean and stupid YouTube comment!  YouTube comments are notoriously retarded.  Other YouTubers do entire episodes devoted to the stupid comments that they get, yet I have none!  I feel left out!  Clearly I need more exposure :)

This project was so fun :  I love burning lime, and now I'm thinking about how cool it would be to build something larger using a method similar to the straw kilns I show in these videos.  Something like this ancient style of coiled straw/clay Mexican granary that was the indirect inspiration for my kiln design, via friend and natural builder Michael Smith who saw these in Mexico and then innovated a straw/clay wattle wall system.

Super neat Mexican granary design utilizing straw and clay in a coiled pot type of form.  This would almost surely use much more clay than I'm using.  I'm intrigued though by the idea of using a mix more similar to the pet to build somethi…

Super neat Mexican granary design utilizing straw and clay in a coiled pot type of form.  This would almost surely use much more clay than I'm using.  I'm intrigued though by the idea of using a mix more similar to the pet to build something larger, like a pigeon cote, a smoker, or maybe a bedroom...


I made two videos.  One is the short accessible version and the other is longer and more detailed.  It also introduces two of the new series or categories I've been dreaming up which are intended to make content more navigable and allow people to find the content they want to see more easily. 

The Buildzerker! series houses the short version.  It is a series for shorter general interest versions of projects I do.  For every person out there who is ready to know how to burn and slake lime in some detail, there must be hundreds that just think it's interesting to watch, or who might be influenced in some positive way simply by seeing it happen.  Buildzerker! is a way to entertain people, while planting seeds that may someday grow.  When anyone is ready, the long version is there.  I'm very happy with this effort.  It is fast paced, visually interesting and even beautiful, while covering a subject that is truly interesting.  I tried as hard as I could to make it worth 7 minutes of almost any persons life.

BuildCult is for more detailed how to versions of projects intended to transmit more knowledge.  This one is also fast paced, but packs a ton of information into 20 minutes, while still having all of the visual interest of the simple version.

I like both of them, and am really looking forward to making more.  I feel like I'm doing what I should be doing, and that's always good.  I hope you have a great day.

Video Series on Making Quality Hide Glue


I'm shooting a video series on making high grade hide glue.  At least that is the goal, we'll see when I test the glue after it's finished, or maybe have it tested by someone else.  The third video, on liming, is uploading to YouTube as I'm typing this.  The approach is a sort of learn as you follow along kind of thing, going through the process of turning a cattle hide from Tamara's recent cattle processing class into hide glue.  Every time I go to work on the skin, I take some video and edit it down.  One section is sort of a lecture type deal with some chalkboard action, one is on fleshing and, aside from the liming one uploading now, the others will be de-hairing and de-liming, cooking and pouring, then finally cutting and drying.  Maybe at some point there will be one on testing the finished glue.

This hide glue series will be fairly long, but there are things in there to learn beyond making hide glue.  Little snippets about other stuff relating to tanning skins and such inevitably work their way in.  No process is an island after all.  So far these videos have been decidedly lacking in popularity and the total number of people that really get a lot out of this will probably not be that many.  But it will be there when people are ready for it, and that is most of the reason I do this stuff at this point, as a reference archive and so it doesn't all die with me one day.  Personally, I think it's really cool, even though I've so far mostly restrained myself from going on long tangents about multiple related processes and ideas.  Poking around looking at other hide glue videos on youtube, a lot (or most?) of them use rawhide chew toys cut up in pieces.  Nothing wrong with that in context I suppose, but that has never been what we, or the genesis of Paleotechnics, has ever been about.  I'm definitely bringing you something closer to the ground up version.

The link below goes to the main Playlist into which all videos in the series will be placed as they come out.  I think anyone with any kind of google account, like Gmail, can subscribe for updates.  My channel, for now, is a mixed bag of stuff I get up to.  I'm also currently also doing a series on amateur apple breeding, which will follow my progress over the years attempting to breed up some new red fleshed apples here at the Turkeysong experimental homestead.  For the hide glue series,  I'm in the dehairing/refleshing/deliming process now, so that one should be up soon.  When finished, I will probably sell the glue on Etsy.  If that works, maybe I'll add artisan hide glue making to my list of little income sources.  Artisanal hide glue for artisanal artisans, you know instrument makers, fine artists who use traditional materials, fine woodworkers that want their furniture to be fully repairable in the future and the likes of them.  People who are keepin' it real!  See ya...

glue#1thumbFINISHEDYELLOW

Seasoning Bones: How to avoid cracking in drying bones

bone seasoning header Bone is a beautiful and useful material, but if you pick up any random bone from the yard, or one that has been buried, it may very well be cracked.  That is because bones contain quite a bit of water and, like wood, when drying bone is subjected to stresses caused by shrinkage.  Something has to give if the stress is high, and the bone will start to come apart along the grain forming “checks”.  Rules similar to those for drying wood without checking can be applied to bone. Typical cracking along the grain of the bone.  Bone, like wood, has a grain direction.

Size matters:  Like a large piece of wood, a large bone is more liable to crack than a small one.  Small bones will often dry without cracking regardless of how they are dried.  If I bury a leg and dig it up a year later, none of the small toe bones will be cracked, but most of the larger leg bones will have checks in them. Speed matters:  Drying things fast causes more stress than drying things slow.  That is because when things dry they shrink.  As the outside, which is drying faster, shrinks, it has to shrink around the plumper, slower drying interior and cracks are liable to form in the outside.  It helps quite a bit that bones are hollow.  One way to decrease checking in wood is to bore a hole through the center.  But, see next... Bone is very dense:  Dense materials tend to check more easily than less dense materials.  Very heavy dense woods are more liable to cracking in general than light porous woods for instance.  So, even though bones generally have the advantage of being hollow, they still have a strong tendency to check if not dried in a controlled way.  If a bone was at thick as a tree or split piece of wood, I doubt there would be much that you could do to prevent checking, or at least it would take extreme measures. Control drying:  The best way to avoid checking is to control the speed of drying, and there are several ways to do this.       *Humid environment:  Drying in a humid environment slows moisture loss, and that’s what it’s all about.  If the moisture loss is gradual, moisture from the interior of the bone has time to redistribute throughout the bone, resulting in more even moisture loss, which translates to less stress on the bone’s structure.       *Slowing drying of the exterior with a coating:  Coating the bone with something to slow the drying of the exterior will also allow the whole bone to dry at a more even rate, greatly reducing the likelihood of checking.  Using animal fat is easy and effective.  Fat can also seep into the bone replacing some of the water.

This bone was not oiled, but just dried in the shade.  It didn't crack because the oil from inside it, the marrow oil, seeped into the bone, replacing the water.  it was also dried in the shade.

      *Boiling:  I actually don’t know if this works, but boiling wood can reduce checking.  I think it works by breaking down the cell structure of the plant allowing water to move from the inside of the wood to the outside.  It seems to me that boiled bones have less tendency to check when drying, but that is a very casual observation and one I’m not willing to stand behind!  Boiling a bone definitely removes some of the protein material that cements it together, so I don’t recommend long boiling for the most part, since it may weaken the structure, though I suppose it depends on what you are planning to use it for.  Further experimentation is definitely needed.  I would say that if other methods are used carefully boiling is unnecessary, but could be an alternative and is interesting regardless and who knows how knowledge might be handy.

This bone is heavily checked from repeated wetting and drying as well as baking very dry in the sun.  Also, there is no oil left in the bone after so much time and weathering.  Bone, again like wood, prefers to have a little oil in it.

If you only want a small piece of bone, just go out and find one and break it or cut it up.  Examine it VERY CLOSELY for any checks if you are about to invest any significant amount of effort into making something nice.  I speak from experience :-/   Bones, like wood, have a grain that runs longwise.  If the bone is checked and it is cut across the grain, whatever you make might very well fall apart. If I want a bone completely unchecked for making tools or jewelry or something like that, here is what I usually do and it seems to work very well. Like wood, fresh bone can form checks very quickly in hot dry weather, and I mean within minutes, not hours, so don’t leave them in the sun, and don’t procrastinate too much.  Again, this depends on the bone’s character, size, thickness, the weather etc... but just be warned that it can happen very fast. Saw off the ends if you don’t need them.  Clean out the marrow with a stick. This allows the interior of the bone to dry along with the outside, which means more even moisture loss and less checking.  Plenty of marrow oil will usually stay inside the hollow portion of the bone. Scrape the outside of the bone clean with a knife or stone flake. Oil heavily, preferably with a heavy tallow type of oil such as that from deer, goat, elk, moose, sheep, antelope or cattle.  Put it on really thick.

Deer bone from this year oiled with Deer tallow, which is so thick that it acts almost like a wax, resulting in very slow drying.

If using a lighter oil, like lard, bear, raccoon etc, or if the bone is very large and thick, you may want to put the bones in a plastic bag for extra insurance.  Don’t seal the bag.  Leave it very slightly open, or poke some holes in it to let moisture escape slowly.  This may not be necessary, but is good insurance and easy enough to do. Keep out of the sun or very hot areas, to assure slower drying. That’s it!  I’ve seasoned many bones successfully this way and actually can’t recall any failures.  By contrast, bones left lying about will generally form checks unless they are very small or thin. I have a small collection of seasoned bone that I keep around.  When I run across a really nice thick walled bone that I might want to use for something later, I’ll season it out as above and store it for eventual use. It's also good to know that fresh bone is much easier to work that seasoned bone!  If you just keep a little oil on the bone and work in the shade, you can make your item out of fresh green bone and then oil it to season out when you're done.

A few of my stash of seasoned bones for making stuff.  I wish I had some pictures of all the cool bone stuff I've made over the years, but I don't.

Posted on September 18, 2014 and filed under Animal Parts, materials.

Antler v.s. Bone: A contest of context.

By Steven Edholm We like to see things as black and white, good or bad, better and worse.  It helps us function in daily life where we need to make fast judgements or live on cruise control without having to over analyze everything.  But it is also a trap that can limit us and cause us to do really dumb stuff.  It helps to look at things in context.  We can pit antler against bone to see which one is better for tools and such, but the victor will be dependent on circumstance and what it is that we are trying to accomplish, rather than on more arbitrary grounds.  Both Tamara and I have largely gravitated toward espousing and detailing the qualities of materials as a way to view paleotechnics.  While our feeble minds may gravitate toward one or the other as superior, redwood is not oak, soapstone is not jade, antler is not bone, and none is superior to the other except in the context of specific uses.  Bury an oak fencepost and it will probably fall over in 5 to 10 years, where redwood may last for 50 or much more.  Make a bow out of redwood heartwood, but in spite of your best design efforts, it’s just going to be kind of lame.

Some bone and anlter objects.  The hoop in the center is elk antler thinned by scraping with stone flakes.  Bottom is a bone handle for a dry hide scraper of chert stone.  top right is a handle for a stone scraper with relief carving.  top left, is an antler pressure flaker bound to a wooden handle.  All of these items are made with primitive processes.

Bone and antler are similar materials.  The qualities of both can vary quite a bit, but they are still very different.  bone can be more or less flexible depending on many factors, like what part of the animal, what species, age etc.. but antler is, by it’s nature, generally tougher and more flexible than bone.  Some uses of these two materials will overlap, while for others, one is clearly superior to the other.  Keep these thoughts in mind as I’m speaking in generalities here.

Bone is harder than antler as a rule but, like many hard things, it is also more brittle and less likely to survive impacts, bending and twisting. However, being harder, bone also takes a better edge.  It’s not going to sharpen up and hold an edge really well, but better than antler. Bone is more liable to check and crack in drying.

Antler is softer and tougher as a rule.  It can be more easily bent (though major thinning is still usually required).  It will not hold an edge as well, but then it also won’t snap as easily.  When used to pressure flake arrow points, the stone dents into antler easily providing a ready grip.  Sometimes that’s good, and sometimes the harder material of bone is better used.

Antler earrings.  These could be made of bone, and I've made a lot of bone ones, but antler is less likely to check, or crack under pressure.

Think about it.  An antler is made to clash with other antlers in violent conflicts.  Bucks slamming into each other with tremendous force, and then twisting and throwing their full body weights around by the antlers on their heads.  I was awakened a month ago in the middle of the night by two bucks going at it down in the woods.  Believe me, they are not messing around!  It’s no wonder antlers sometimes break off during these fights, but they usually don’t.  Antler can almost be viewed as a very hard and tough wood, though it probably exceeds all woods in these qualities.  Bone has to be tough as well, but not as tough.    Green bone is much more flexible than dry bone.  Bones didn’t evolve to be tough after we have died, just while we are still using them.  Antlers didn’t evolve to be tough after the bucks are done with them either, but they are tougher than bone to start with and still tougher than bone when cast off.

The material from which the two are made are different.  Antler contains a great deal of collagen and is more related to skin than it is to bone.  Over cooking it will result in a loss of collagen.  That’s great if you’re making glue, but not if you want a strong piece of antler.  bone will also weaken and dissolve glue making substance into the water when cooked, but it will lose that substance more slowly.  My general tendency is to think that cooking either one as little as possible is ideal, though weathered bone, which has lost much of it’s glue substance, is sometimes very flexible, so I try to keep an open mind on that one.

Antler is good for pressure flaking tools, bent items, stone working batons and handles.  It is easier to carve and work with, especially when soaked in water overnight.  If thinned evenly and enough, it can be dropped in boiling water to heat it through and then bent into a pretty tight radius without cracking.  It usually has a spongy pith that softens on soaking and heating.  Other items, like blades, can be set into the soft pith, which then hardens on drying gripping the item tightly.  Antler, being soft and somewhat fibrous, can't take as good a polish as bone, and the polish is as lasting.

Bone is better for edges (though not comparable to a good edge stone like flint) and tools that need to stay sharp, like an awl, it can work well as a pressure flaker depending on the circumstance.  Think arrowheads, harpoon points, hide scrapers and stuff like that.  Bone sometimes has as spongy looking core which can be useful as a paintbrush for painting on skin, but it's pith doesn't have the same qualities that allow antler to hold onto things like knife blades firmly.  Bone can take a very high polish.

These fish hook/lures with bone points were made by someone at the Rabbit Stick Rendezvous.  If I had to guess I'd say it was Goode Jones or Patrick Farneman.  Antler would not serve quite as well.  It would be tougher, but would soften in water, and not take as keen of an edge as bone.

I hope this short article leads to a better understanding of the qualities and potential uses of these two useful and beautiful materials, and that I didn't forget anything important.  When we understand the qualities of the materials in our world, it leads to a wide open potential for creative, adaptive responses to our needs and desires in interacting with our environments, and that is what paleotechnics is all about.

Posted on October 28, 2013 and filed under Animal Parts, materials, tools.

Understanding Lime: an introduction to forms of lime and where they come from

burning shells light

By Steven Edholm

I used to be so confused about lime.  Some limes have more than one name and more than one use which can be difficult to keep sorted out in your head when you have no frame of reference.  Lime is super neat though, and worth understanding.  I’ll attempt here to present the types of lime and their uses in a way that is accessible to people without that frame of reference... or maybe offer an accessible frame of reference for understanding lime.  For more on lime burning and the lime cycle see The lime squad I and Lime Squad II posts on the Turkeysong blog.

First off, lime is cool, and so useful!  Understanding what uses there are for lime can help us understand the three basic forms of lime that we might have access to or make.  The basic use groups are these.

Reactive uses:  use the caustic nature of limes to chemically attack plant and animal substances in food processing and tanning of skins.  In other reactive uses, lime reacts chemically with other elements as in dyeing or to potentiate the drug alkaloids found in Coca leaves and Betel nut.

Plastic uses:  These are used for building, painting and in the arts.  the lime is shaped it how we want it before it dries and hardens.

Agricultural uses:  Used to adjust soil acidity into a range suitable for most plant growth, as well as to provide calcium.

Nutritional uses:  as a calcium supplement.

Filler uses:  Powder used as a filler in the arts for painting and sizing.

Fluxing:  Used to lower the melting temperature of unwanted materials during smelting of metals.

Thats enough basic uses for us to tackle in this short article about understanding the different forms of lime.  In future articles, I may address each use group more specifically to cement that understanding.

Shells in a garden trench prepared for a perennial planting.  More finely ground shells are more useful, as is ground lime stone.  By the way, bones (also seen in the trench) do have quite a bit of calcium, but are not used in the production of lime.  They are more useful as a source of phosphorous.

All lime comes from biological processes!  Wow!  that’s amazing.  All those billions of tons of limestone, chalk, marble, shells, coral and all that stuff was collected from the environment by living organisms.  When the organisms died they left deposits of their calcium rich shells which have changed form over time.  That's humbling.

Lime can exist in three basic forms in a simple “cycle”.  The lime can change from one form to the next in this cycle, and back again.  The basic material is calcium with variations in what is and isn’t attached to it.  We start the cycle at limestone.

Limestone:  Limestone, shells, marble, chalk etc.... there are various forms of limestone, but they are all basically the same material.  One type contains a lot of Magnesium in a similar form and we call that Dolomite lime.  Dolomite's uses are similar to regular limestone.  The limestone form, including shells of all kinds, is Calcium Carbonate.  It is calcium with 3 carbon atoms attached to it.  You know, carbon as in carbon dioxide the famous greenhouse gas.  We are all familiar enough to know what stone and shell are like.  They are hard and tough.  Maybe more important to understand is that they are not really reactive.  We can throw rocks and shells in water and they just sit there.  The take home message is that they are stable so they resist the elements.  Calcium Carbonate is the most natural and common form of lime and the one that other forms of lime will naturally turn into if exposed to the environment.

Quicklime:  If we take our Limestone rocks or shells and heat them up to a red heat, we drive off the carbon completely replacing those three carbon atoms with one oxygen atom to make CaO (calcium oxide) one calcium to one Oxygen.  If you're starting to get nervous about all that chemistry crap, never mind the chemistry.  The important thing to know is that the burned lime is highly unstable and very quick indeed to react to moisture.  Unless stored in a completely sealed container, it will quickly begin to react with the elements of the environment and start the process of turning back into limestone.  Quicklime is so unstable (and unsafe to have around) that it should be slaked processed into the next form) as soon as possible, preferably right after burning.  Quicklime is very light in weight without those carbon molecules which are now floating around in the environment somewhere as greenhouse gasses.  It is also thirsty for water which it can pick up from even the little bit in the atmosphere.  If left out, quicklime will usually absorb moisture from the air, often falling into a pile of fine powder which brings us to our next stage of the cycle...

calcined shells

Hydrated lime and lime putty:  When water is added to the thirsty quicklime, it absorbs H2O molecules rapidly forming Calcium Hydroxide.  One Calcium, two Oxygen and two Hydrogen.  In this process heat is given off and the mixture can even boil violently.  There are a couple forms of calcium hydroxide. If the calcium hydroxide is made in the form of a putty with excess water and stored in this wet state, it is known as lime putty.  Lime putty is the most reactive form of calcium hydroxide,  and the most  stable way to store it.  Lime putty is completely safe from conversion into limestone, as long as it is kept wet with no exposure to the air.  More commonly, Calcium hydroxide is found in the form of a fine powder known as builders lime, type S or hydrated lime.  This powder of lime is often used in tanning and building because it is convenient to store and sell in the dry form, but it is less stable because a portion of it will turn back into the limestone form with exposure to air, which also makes it less reactive.  Don’t worry if you are getting confused already, we are going to drive home this information with practical examples and if you ever use lime, you will begin to form a context for understanding and remembering the different forms.

Slaking quicklime in a barrel.  Note the bubbles, this is actually boiling from the violent reaction when water is made available.

The half of the burnt shell on the left has had moisture added to it ( I peed on it.. no reallu) and has fallen into a powder making hydrated lime.

So there are the three forms of lime, but to close the cycle the last form, calcium hydroxide or hydrated lime, has to turn back into limestone.  This process is simple and we hinted at it already.  When the lime putty is dried it absorbs carbon from the air turning back into limestone.  In the case of hydrated, or powdered lime, the powdered lime is wetted first and then absorbs carbon as it dries, though it doesn’t carbonate as thoroughly as lime putty.  You might be getting the idea that I’m partial to the lime putty form rather than the powdered form, and you’re right, but the powdered form is useful too and often what is available.  More on that later...

BURN *So, we have gone from limestone rocks or shells which we heated up to drive off carbon causing the atmosphere to warm up, killing the planet.

SLAKE *Then we added water to the resulting thirsty quicklime which boiled violently or fell into a fine powder depending on how much water was added.

CURE *Then we let the spreadable, wet lime putty, or hydrated lime paste , dry slowly.  As the lime dries is reabsorbs carbon from the air saving the planet form carbon dioxide poisoning and forming limestone again.

We can use lime at these various stages for different purposes.  There are so many different uses for lime, that we’ll defer most of that discussion for another time, but here are the characteristics of each type of lime discussed in the context of some common uses.

Limestone, Shells, Etc:  (Calcium Carbonate).  Having been stabilized by the absorption of Carbon dioxide, Limestone, shell, marble etc.. are basically stone as we commonly think of it.  The stone can be used for building and paving of course.  Limestone and shell can also be used in agriculture in a powdered form, and while other forms of lime can be applied to the soil as well, it is usually the carbonate form that is used.  Lime increases the ph of soils by buffering soil acidity.  Calcium Carbonate is fairly stable and non-reactive, but acids, like Carbonic acid naturally found in the ground, slowly dissolve the lime in the soil which is washed out by rains.  Lime, usually as ground shell, can also be used as a nutritional supplement and in animal feeds, particularly to provide a source of calcium for chickens ensuring strong eggshells.

Quicklime:  Quicklime is dangerous to handle and store because it is highly reactive.  It heats rapidly and undergoes a violent reaction when water is applied.  This process is called slaking.  If the water is applied slowly and in measured quantity, the quicklime will fall into a very fine powder of hydrated lime.  If it is slaked with more water, the water may boil and spit hot lime putty and caustic alkaline solution all over the place.  It also expands a great deal during slaking, which is sometimes taken advantage of in building.  By using the still expanding quicklime to mortar walls, the lime, sand mixture is forced into all crevices in the stone.  Quicklimes uses  in the arts are actually minimal.  The most common use of quicklime is probably as a flux in smelting metals, though it is often added in the calcuim carbonate form as shells in primitive smelting, which then cook into quicklime in the smelter.

Hydrated lime and lime putty (Calcium Hydroxide): This is the form of lime with the most uses in arts, trades and cooking.  It is chemically reactive, alkaline and caustic.  Being highly alkaline, it modifies or attacks other materials like some proteins and cellulose, making it very useful.  it also reacts with fats to form soluble soaps.  When it dries it turns back into limestone as we said, which is non-reactive except with acids.  Calcium hydroxide can be used to prepare skins for tanning by attacking certain proteins to release the hair from the skin, and dissolving various substances in the skin fiber which can then be removed by washing.  It can also be used to process corn to make it more digestible in a process called nixtamalization (for more on which see this excellent page on corn processing and tortillas).  There are many many uses for Calcium Hydroxide.

  • Type S or Hydrated Lime (aka, builders lime):  is a fine powder form of calcium hydroxide.  Hydrated lime is convenient to store and ship, but is not as reactive as lime putty and makes a relatively poor material for building purposes (even though it is often called builder’s lime which says more about our building ethic than anything else).  It’s convenient form however makes it the most common form of Calcium Hydroxide and it is perfectly fine for some uses like preparing skins and nixtimalizing corn.
  •  Lime Putty:  Lime putty will keep indefinitely if stored with a thin layer of water over it and can even improve over time.  Some lime putty is stored for years to make fine quality limes for exacting uses such as fresco paintings.  It is the most caustic form of Calcium Hydroxide and should be the first choice for building purposes and arts unless a powder is required.  When used for its reactive properties, less is needed than when using hydrated lime.  When used in building, it has better workability, carbonates more thoroughly and consolidates into an all around more durable material upon curing.  Adding water to hydrated lime does not make lime putty, it has to be made during slaking by the addition of a larger amount of water.

Beautiful creamy, chemically reactive quick lime keeps indefinitely under a thin layer of water.

RECAP:

*Lime is neat and useful!

*There are three basic forms of lime with different properties and two basic forms of the most used form, which is Calcium Hydroxide.

Shells and Limestone are fairly inert and stable as they are.

burned shells narrow

*Calcium hydroxide in the form of either powder or putty is caustic and reactive with many substances making it very useful.

*Calcium hydroxide as hydrated lime powder is convenient and fine for many uses, though not as reactive.  It makes a poor building material.

*Calcium hydroxide as lime putty stores indefinitely underwater, has the highest viability and is best for building uses.

Posted on March 3, 2013 and filed under materials.

Better Sticks, Staves, Shafts and Withes: finding and encouraging straighter shoots

hand drill shafts lined up on table

By: Steven Edholm

Need straighter, longer, or more evenly tapered sticks?  Who doesn’t?  It’s not always easy to find a nice stick when you need one.  We might have plans for certain types of sticks, but nature has priorities other than providing us with them, and doesn't necessarily have the same criteria for "better sticks" as we do.  Knowing where to look for straight wood, and how to manage plants for the production of such, is essential knowledge in the paleo arts.  Now that it's winter, it's time to harvest twigs and sticks for our baskets and hand drills and things like that, so I thought a post on the subject would be appropriate.

Many basketry styles require long  and relatively straight materials that are difficult to find a naturally occuring growth.

What we're looking for:  More uniform than average twigs, sticks and staves find many uses.  Arrows, hoops, spears, hand drill shafts, basketry elements and bowstaves are some classic examples.  There are several characteristics that we are commonly looking for in sticks for making stuff:

Straight (or at least with long gentle curves instead of short sharp bends)


Free of branches


Gradually tapering (i.e. not a very different diameter at the top and bottom)


Long (of course that’s relative)


We may need only one or two of these characteristics, but we would often like to find them all in the same stick.

Nascent v.s. mature growth: Some trees and shrubs grow naturally straight and branch free, but the norm is various degrees of curved, zig zagging and short jointed branches growing in all directions.  Many species do however have the capability of growing straight given the proper stimulus, resources, and conditions.

When trees and shrubs grow from seed, they get off to a slow start.  Each year, the seedling root system gets bigger foraging nutrients and water underground and storing some of those resources for spring growth.  A few seedlings luck out and get the best spot ever, growing rapidly upward, but growth in seedlings is slow as a rule.

Even with the resources gathered by a large root system, more mature trees and shrubs typically grow slower with short joints and crooked branches.  This is largely due to the fact that there are so many branches competing for those resources.  The growth of a plant is largely determined by competition with itself.  If we reduce competition, we can channel an abundance of growth energy into fewer growing points- enter nascent growth...

You would probably not be able to find a single decent hand drill shaft in this older buckeye tree.  It it were burned or cut back though it would grow a profusion of new tall straight shoots from the stump.  The tree is adapted to this kind of treatment because of aeons of exposure to wildfires.

Nascent growth is fast vigorous growth.  The defining factor is that is has access to resources for rapid extension of the shoot during the growing season.  There can be numerous reasons that the shoot has access to the food and water needed for rapid growth.

One way the shoot may gain advantage in the structure of the tree is by it’s placement relative to the physiology of the tree.  The shoots known as water sprouts, or suckers, on fruit trees are a good example that many people are familiar with.  Hormones within the tree can suppress or encourage growth and the water sprout has managed to bypass the growth suppression hormones taking a large share of food for it’s growth.

Conditions conducive to nascent growth: Dormant buds can be stimulated to grow by a change in the position of the branch or trunk.  The tips of branches and trees usually send growth suppressing hormones down to stunt growth of lower branches, while continuing to grow taller themselves.  This phenomenon for the sciencey among you is called Apical Dominance.  Lower branches, guided by hormones from above, make less vegetative growth and typically do the work of reproduction, producing flowers, fruits and seeds.  If the position of the branch changes, say if a trunk falls over to a horizontal position, or a branch is bowed down heavily by snow, is bent low by a heavy fruit load or is pinned down by a fallen tree, the buds along the top of the branch are now higher than the other buds on the branch.  No longer receiving the “no grow” hormonal message from above, they grow like crazy often causing a mass of long straight shoots reaching for the sky.

When this bay tree fell over many years ago,  Dormant buds in the trunk sprouted and grew straight up.  The once dominant tip of the tree practically stopped growing.

Aside from fallen trees and bent down branches, we can look to some other natural phenomena for opportunities to gather nascent shoots.  Fires and floods can provide these opportunities.  Natural fires are common in many areas and not uncommon in most.  As a result many plants are fire adapted.  When they are burned over, most trees and shrubs can sprout back and grow new structures from their well established root systems.  After a fire, the root resources that supported the whole plant are now channeled into fewer shoots causing them to grow rapidly to compete for light and outgrow predators.  It is in the best interest of the plant to reach a mature stature and begin reproducing as quickly as possible.

Floods provide a similar effect by damaging the above ground portions of plants, though often the shoots will grow in response the plant having been bent over by flood waters rather than torn away.  Plants that grow along river banks and sandbars are well adapted to flooding and usually produce copious shoots after a high water winter.

Practices for encouraging nascent growth:  Practices for managing plant growth are used the world over in traditional cultures and must stretch very far back into the past.  It should be no surprise as it is easy enough to put two and two together when observing natural phenomena.  Now that we know some phenomena that cause nascent growth, we can use management practices to encourage shoots when and where we want them.

Coppicing and pollarding are practices in which the plant is cut back very hard during the dormant season, removing all growth since the last harvest.  The only difference between a coppice and a pollard is that in pollarding a trunk and/or a branchlike tree structure is maintained but headed off at the same point periodically, while coppiced plants are cut at ground level.  Some plants that coppice well, such as willow and osier dogwoods, can be cut to the ground every year for basketry material without suffering any setback, though they are sometimes cut on a multi-year cycle to produce larger material for fencing, fuel, timber or other uses.

willow coppice at Frey's

Cuttings of basket willows in a wet ditch planted for coppice at Turkeysong. The coppicing will begin after a few years of growth when the plants have a root system to support regrowth.

Plants can also be burned to the ground to stimulate new growth.  This is nothing more than coppicing by fire.

One last method I’ll leave you with is bending.  One way to farm shoots on some plants is to bend tall shoots over to a horizontal position, or better yet in a bow shape with the tips lower than the top of the bow.  In some plants new growth will sprout up along the bent branch.  If the branch is high enough the shoots can have an advantage in outgrowing browsing animals like deer.  Browsing could shorten your shoots or cause them to branch or have crooks.  I've been told that this method was used to produce arrow shafts of Mock Orange by Indians in Northwest California, but haven't had an opportunity to try it.

How plants grow:  There are many factors to consider when deciding what to cut and when, such as population density, make up of the forest, management goals, human use and infrastructure, what animals depend on the plant for their living and so on.  Possibly of greatest importance is to know how a particular species grows before you start chopping it down to make sticks.  Most plants will sprout readily from the base, but some will not grow back when cut down.  Others may sprout back, but will not tolerate continual annual coppicing.  Careful observation of natural and human damage to trees and shrubs and their response over time will usually give you the clues you need to get started.  Road crews regularly coppice trees and shrubs along roadsides providing useful materials as well as clues to plant responses to coppicing.  Recently logged or burned areas are other places to start looking at plant regrowth patterns.  It is generally best to cut near the dormant season, anywhere from when the plant growth stops in the fall, to soon after it begins again in the spring.

Given our seeming distance from nature in modern society, it is easy to view cutting down trees and shrubs as inherently negative, as if nature sorts itself out perfectly, but this is not so.  Human harvesting and management practices can have both positive and negative effects.  Often the effect may be negative for one aspect of the ecology and positive for another... in other words, just different, or possibly more accurately an issue of perspective and values.  It is especially true when dealing with logged over land (which is virtually all that is left to us) that some human intervention can have an effect which would be hard to argue as other than positive.  These decisions require some knowledge to be effective and we all have a lot of homework and observation to do in order to earn an honorable place in the scheme of things.  Natural systems are typically tough and chaotic environments and therefore they and their citizens are for the most part fortuitously resilient.  This resilience is amply evidenced by the phenomenon of nascent growth.

A Quick RECAP!

*Straighter, branch free, evenly tapering, long and otherwise more uniform sticks are commonly needed in the paleo arts.

*Many plants are evolved to recover quickly from damage growing up straight and fast.  This quick new growth is known as nascent growth.

*Natural phenomenon such as fires, flooding or wind storms can provide opportunities for the harvest of Nascent shoots and trunks.

*Coppicing (cutting to the ground) and Pollarding (cutting higher up on the trunk) are common pandemic practices for cultivating nice sticks.

*Knowing how a particular species grows, and how it fits into the local ecology can keep us from making management mistakes.  Plants at all stages of growth help provide this information if we pay attention.

For more information and philosophy on sustainable harvest practice see Paleotechnics bulletin #1:  Sustainable Harvest:  approaching wildcrafting with knowledge and intent
.

Before there were toy stores, there were sticks.

Posted on January 2, 2013 and filed under Fiber, materials.